Thursday, March 29, 2012

Looms or Lumber?

Here's the state of the studio after disassembling the looms. The three of them are carefully separated into their own corners. The trick in packing the truck will be to keep the parts separate. It's just way easier to put them back together if I know for sure which parts belong to which loom.

Well, Arcana is the pack master. He got two the looms into a TINY amount of space in the truck, keeping them totally separate from each other. The third one and the 36" folding jack loom went into my van. By the time we finished packing the truck it was pitch black. Today is driving and unpacking day. Yay!

The foremost thought on my mind this morning is gratitude for ibuprofen. I haven't used it in years, but after a winter of sedentary life and two days (so far) of moving lots of heavy things I'm sure glad that bottle is on the shelf. Yes, it's damaging to the liver if it's used too much, but today it's making it possible for me to keep going instead of laying on ice. And I need to make a point of getting more exercise. Apparently, production weaving isn't enough. :)

Tuesday, March 27, 2012

Trying To Avoid The Fallacy Of Sunk Costs

In making decisions for my weaving business, I try to avoid a common fallacy, summarized like this, "I've already spent X to get started. I will lose that money if I don't follow through."

The truth is that I've already lost that money. Once it's spent, it's spent. In every moment begins life anew. This is my opinion, at least, but there are some idioms in English that back me up: "throwing good money after bad", "in for a dime, in for a dollar".

This is also referred to as escalating commitment. I know we've all experienced it when we keep pouring money or energy into a project just so that we don't lose the money or time we've put in already.

I'm reminding myself of this concept because of a series of decisions that made me VERY busy over the last few days. If you look at my strange operation to save the thread that was overwound onto the latest batch of cloth, you might think that I was trying to capture sunk costs in time or materials. Here's what I was actually considering...

1. I have a remote apprentice sort of flitting about in the wings. If he follows through with getting trained, it would be helpful to have the spare loom prepared for him to learn on without affecting the main production machines. If he doesn't, I can use that loom to experiment with new weave structures for new products.
2. If I look at the time that it would take to set this project up afresh, it would very likely be more than the time I'm spending saving the thread from a previous project.
3. Fixing the tension problems on the main beam before beginning to weave will SAVE me time. If I just plow ahead, I will need to stop and adjust fiddly little tension-fixing devices every few minutes. These devices will also just waste the thread a few inches at a time as I weave.
4. On the main project, I actually don't have the spare thread to rewind even the bad sections. I'm really skating on the edge of how little yarn I can have in stock and still get a project done. My investment in black thread for the next project has wiped out my thread budget anyhow.
5. There's a time constraint that keeps me from ordering more yarn for this project. I've got a show in about two weeks and really want blue cloth for that show. That means moving the studio, tying on the new cloth, weaving the sample and producing a couple batches of garments all in one week so that there's time to sew the garments before I leave. Having this cloth in the booth will increase sales and pay for the extra work that it's taking to get it there. Notice that, even if I had the money, there's no time to get the new blue thread in time for this tight deadline.

With all of that said, here is how I would make the decision differently now that I've gone through the process...

Basically, I would not do what I did at all. By plowing through the winding of the beam and pushing off my decision-making until later, I bound myself into the strange work that I just did. Next time, I would not overwind subsequent sections. I would wind them to the diameter that will make for decent tension overall and unwind the few initial sections that were technically correct but ultimately too long.

I also completely underestimated the amount of time that it would take to sley and (UGH!) unsley, 600 threads in a 20-dent reed. This is the one place where I sort of succumbed to escalating commitment. After starting the operation, I would rather put in an extra four hours' work than just throw it all away.

But it's done now, and the packing up of the studio is well under way.

Monday, March 26, 2012

Unsleying To Capture Thread Order

You know how I use multiple threads loosely plied together to make my warp color gradients? Well, this sometimes causes me to jump through flaming hoops to maintain the order of them and remember with certainty which three belong together. Here's what I did yesterday to recapture the thread order for two beams at once.

First, notice that I did not unsley the purple threads that I will be tying onto next week. I just threaded the blue threads in the reed along with them. When it comes time to unsley, I just use post-it notes to keep the two sets of threads separate from each other as I carefully cut one thread at a time.

Then, I stick the two ends to two pieces of tape, one for each beam.

Here's a section that's all done. Just 15 more of them!

When deciding to do this operation, I failed to realize just how long it would take to do with so many threads. Ah, well! It's done now.

Sunday, March 25, 2012

Winding Off Excess Thread Is Done

Well, it is taking longer than I expected, but it's working. Yesterday was a whole day of struggling with unforeseen problems.

The biggest problem is that I warp my threads in pairs. There are 20 slots in the tension box reeds and 39 threads per section. This means that all but one thread are doubled up, allowing them to twist around themselves. It's not usually a problem because they're not really twisted. I guess that for the first half of the beam they're twisting in one direction and going the other direction for the rest of the beam or something. When I'm weaving a beam, the action of opening sheds keeps the twisted threads for tangling and by the time I reach the end of the beam they're not twisted any more.

Well, with this operation, there are not sheds to prevent tangles. And so I transferred 20-30 yards of thread yesterday, 6-12 inches at a time. I wind a little, stop and untangle twists, and wind a little more. This continued late into the night and started up again early this morning. No time for tea today. I've got to have this operation done today because the studio, including all 3 looms, gets broken down and packed starting tomorrow.

But here's the final result: acceptably even amounts of yarn on the beam with the extra yarn saved on the spare loom.

Saturday, March 24, 2012

Contortions To Save Expensive Thread and Work

Yesterday I wrote about a problem with the beam and talked about how I would compensate for it by winding some of the thread off onto the spare loom to weave later. Here's how I am doing it.

First, I moved the setup loom and put together the frame of the spare loom to hold the empty beam and raddle in place for the transfer operation. It's quite crowded with all the looms set up at once!

Then, I attached the long sections to an empty harness bar and pulled them up into place for sleying. Since I'm not weaving, all of the harnesses have been moved out of the way. I am, however, using the 20-dent reed so that every thread gets its own dent. This will preserve my threading order and allow me to transfer that order to the new beam and back to the old beam when this operation is finished.

Next, I am separating the threads into seven units per section and threading them through the raddle. The eighth section is where the section-separating pegs are. With any luck, this will guide the threads into the sections with ease.

Here's the view from the back of the warped loom showing the course of the threads heading toward the new beam. I've got the whole day schedule for transferring the thread (including time to work around whatever problems arise in this strange operation), capturing the threading order on the spare beam and the original beam, and tearing the whole setup down.

Friday, March 23, 2012

Counting Mechanism Error

Yesterday I made reference to a terrible problem with the blue beam. Here's what happened...

Before I go into it, I want to talk about a concept called "Trusted Systems". It's one that I embraced years ago in order to free my mind of worry over lots of little details. Instead of perpetually worrying about every little aspect of everything that I do, I set up systems that I trust to handle the details for me. For show management, it's Daylite. For tasks, it's OmniFocus. For accounting, it's QuickBooks. Each of these have a method that they I use to let them do their work. I follow the method and everything just works.

In weaving, there are numerous systems that I use for the various steps in the process. In setting up a trusted system, I test and test, scrutinizing every little detail... and then I give the system my trust and let it do the work.

Well, my trust in one of the systems turns out to have been ill-bestowed. It is a tiny part of a big process: the counting mechanism that helps me wind consistent amounts of yarn onto the separate sections of a beam. This mechanism consists of a threaded rod with a bell that hangs from it. I mount a tape line to indicate how many revolutions I will be winding onto the beam, and hang the bell at that line. Then, as I wind, the bell moves toward the end of the rod until it falls off with a clang! to tell me that the winding is done.

This rod is attached to the beam by means of a wooden plug that inserts into the end of the beam's axle. I insert a screw through a hole in the axle to be sure that the plug doesn't "precess", rotating slightly in its place and getting out of sync with the axle.

I've used this system for over 600 yards of cloth. At first I scrutinized it, but as time wore on I just came to trust it. Each beam had been more accurately wound than that last, indicating that my skill was increasing and that the counting rod "just works".

Until now.

There's a new factor in the basement studio. Even though this is not the first beam I've wound here, this one factor has just arrived. It's humidity. As the year has become more and more wet, I have cranked up the humidifier higher and higher. The air is dry, but there are still some spots in the concrete that remain wet. Moisture breeds mold, one of the worst nightmares of a weaver.

Low humidity causes wood to shrink. Like the wooden plug that holds the counting mechanism in place.

At first, when I moved the winding tools from the humid garage to the dry studio, the mechanism worked as expected. Then, over the next couple of days it dried out and got smaller. This made it get looser and looser in its connection to the axle, letting it flop more and more as it rotated. Then, the flopping bell started to jump on the rod. I always insert the bell in the same direction, so it always jumped in the same direction, skipping over threads on the rod and reducing the actual number of rotations before it told me I was done winding.

But I had never seen it behave badly in the past so I trusted it. I noticed the sections getting smaller and smaller, but thought it was the fault of a thread that was slightly thinner than the others making the finished diameter a little less. Then I noticed a noise coming from the bell. Tink. Tink. Tink. I watched it as I wound and was horrified at what I saw. After reaching the half way point, each turn of the beam was being counted as two.

I taped the thing to the axle and went on winding, determined that I would fix the resulting bad beam later. No matter what, I wasn't going to remove hundreds of dollars in thread and days of my time from the beam.

I finished winding last night, and here's the final result:

When I measure the circumference, the widest sections are 48" long. The shortest are 44" long. This is a problem.

I've thought long and hard about the solution and I think I've found one. I'm going to thread the "long" sections through a reed and wind them off onto the beam of my "spare" loom, the 46" production dobby. This will be laborious, for sure, but it will allow me to save that thread and those gradients in a way that they can be used for another project. It's 20 sections that are too long, and they're too long by about 20 yards. This will eventually give me 20 yards of 40" wide cloth in a gorgeous array of blues. But more important to me, it will capture the work that I've already put into this and help me to eventually get paid for it.

And I'm still moving in a few days so I'd better get down there and get to it.

Thursday, March 22, 2012

New Auto-advance Mechanism

It's like Christmas in the studio right now with all these gifts arriving in the mail. Well, except that I had to pay for them.

This time it's the new auto-advance mechanism for the second loom, which I can now call production-ready. This one part is critical to weaving my cloth at a production scale. There are so many things to keep track of on the loom that consistent advancing of the cloth is one that is better left to the machine itself.

I'll describe it for those who aren't familiar with such a device... The AVL looms have a ratcheted rotating sandpaper breast beam to which the cloth grips as it passes over. This separates warp tension from finished cloth tension. After cloth is cranked over the beam, it can be cut from the loom without affecting the warp tension.

The sandpaper beam also paves the way for the auto-advance mechanism. This device advances the cloth a tiny amount with each beat of the cloth so the threads are spaced evenly and the fell line stays constant. All that the weaver needs to do is beat against the bumpers and the thread magically lands right where it needs to.

...and here's how it actually works. When the weaver pulls the beater forward to beat the cloth, this arm rotates forward, too. (On a hanging beater, these arms connect to a steel rod to stabilize the beater and help keep the reed parallel to the fell line.) When the arm swings, it pushes that metal rod forward.

The metal rod is connected to the arm of the auto-advance mechanism. This arm moves forward, rotating the one-way ratcheting axle.

On the other end of the axle is a small gear that turns a big gear that rotates the breast beam itself, advancing the cloth.

The amount that the cloth advances can be adjusted by the combination of attachment points, to the beater arm and to the auto-advance arm. You just move the connectors up and down in the holes on either arm to increase and decrease the amount that the cloth is advanced. It's a little tricky to get set up right, but I keep notes on my setups so that I can replicate them without all the adjusting and testing.

Ordering and receiving this item was a breeze. You'll notice that I don't write about negative experiences very much, especially in the heat of emotion. Ordering the auto-advance last year was trying. I had just finished my weaving contract and was getting started on my own. I needed that part ASAP. It took AVL over two months to get it to me, though, leaving me dead in the water and waiting. Just to be clear, this hasn't been my usual experience. AVL is expensive, but their equipment is top-notch and their service is usually better than that.

This time was fantastic. I ordered it, reiterating that I needed it quickly, and received assurance that they had the parts in stock. It shipped a few days later and was in my hands a few days after that. The timing is perfect since the grey cloth is taking longer than I expected to get off the main production loom. I will need to weave at least the first few sets of garments on the secondary loom in order to have blue garments for a show in mid-April.

And that fact explains my motive in spending all this money right now. Yeah, I'm always skating near broke. And the reason for this is that I spend money to increase my opportunities. Last year I bought this loom even though I don't strictly "need" it. It affords me the opportunity to wind a beam while another is being woven, reducing the time between cloth batches from two weeks to two hours. This latest expenditure gives me the opportunity to rush out a new color when I need to, leapfrogging the current batch of weaving for the sake of variety in my booth. I am finding that blue sells better than anything else. In analyzing my stellar sales of green and purple, I'm finding that the garments with lots of blue in the weft account for most of those sales, too. Customers want blue. By increasing the variety of blue cloth in the booth for the next show, I'm very likely increasing my sales to the point that they will offset the expenditure in a single show's income. And, even after that first show has paid for the expense, the part will live in my studio and increase my opportunities for years to come.

It's actually foolish to NOT spend that money, in my opinion. Maybe not foolish, but certainly short-sighted. So I spent it and now it's time to get to work making the cloth that this new part lets me make.

The studio move is now scheduled:
Monday-Tuesday: Teardown
Wednesday: Truck Packing, Old House Cleaning
Thursday: Moving and Unpacking
Friday-Sunday: New Studio Setup

That leaves four days to finish winding the blue beam, including working around a terrible problem that I'll explain better in another post.

Tuesday, March 20, 2012

More New "Black" Yarn

Woohoo! UPS dropped off another three boxes of yarn today. This was a fairly large order of mercerized cotton in black and dark jewel tones.

For those of you who aren't fiber nerds, mercerized cotton is shiny and smooth. It has a sparkly luster that looks sort of like silk.

You'll notice that there are a lot of colors here other than black. This batch of cloth will be based on the night sky. The colored threads will be jewel-colored shooting stars. They will be plied with the various shades of black so that they disappear and reappear as they wrap around the thick main threads, truly giving the appearance of points of light in motion across the cloth.

I'm still waiting on another 80 pounds of thin black thread which will be the first yarn to ship to my new studio. Until then, here is my black binge so far, weighing in at about 145 pounds...

And, as a bonus, the new thread comes on cones that are the right size for my Silver Needles cone winder. This means that I can cancel the order that I was about to place for new empty cones. These will all be empty soon enough!

Monday, March 19, 2012

Siiiiick!

Ohmygosh!

I can't believe how sick I've been. It seems like a relapse of the flu that came earlier this year, but much more severe. I'm thankful today for the ability to sit upright, sort of. Along with lungs and sinuses, this flu seems to have attacked a strange joint - the one between the left sacrum and the pelvis (the sacroiliac joint, if I remember my anatomy...) It's swollen, cutting off sensation to that leg and causing every muscle from the knee to the shoulder to lock up in cramp. There is no position that doesn't cause immense pain and no stretching that loosens the muscles. Pedicularis, wintergreen, and castoreum are my salvation today along with the DayQuil.

We're moving next week. I need to finish winding a beam and weaving off some garments for a show in three weeks. Instead I'm laying in bed high on symptom-suppressing flu drugs. And I'm glad I have them.

Currently reading, through Librivox, Bram Stoker's "Dracula".

Friday, March 16, 2012

Another New Studio

For those of you who are keeping track, this will be the fourth studio in twelve months.

This time last year, I lived in a tiny cabin. At midsummer, I moved the into the spacious downtown Wolf Creek studio while waiting for other members of the collective to come together. In October, we all moved together into a house in Glendale with a six-month lease, increasing the studio space again.

And here we are now. The six months are up and we've found the place of our dreams. This time we're signing a one-year lease, but the landlord wants us to stay longer. The new studio is even larger than the current one.

While I was at the show last weekend, some others from the group went and saw the place. I saw it for the first time yesterday when we went to sign the lease.

I was so captivated with the house and wanting to get down some measurements to figure out how the studio will lay out that I didn't take any photos.

The house itself is huge - even larger than the one that we're currently in, and much nicer. My studio will be in the detached two-story garage.

The tricky piece to lay out is the upstairs. It's a strange shape which dictates how the equipment can fit up there.

In this image you can see the shape, sort of. The two nooks that will house the looms are 8' high with the left and right sides sloping in. The dotted lines next to the looms indicate the area where the ceiling is less than 6' high, the height of the loom.

Those blue ovals give an approximation of the coverage from my fluorescent fixtures. It's important that I have sufficient light to work, even though the space has little natural light.

You'll notice that the two center fixtures have larger ovals. That's because the ceiling is much higher there, causing them the distribute their light much further and more diffusely.

And then there's the downstairs, the big, open garage space.

That will be storage for yarn, cloth, garments, and booth parts. It will also be the location of the yarn plying, cutting, and sewing areas. And somewhere in there, we'll be installing a kiln.

I did a poor job of measuring the downstairs so I don't know things like how much of the ceiling is covered by the garage door when it's opened, exactly where and what size the built-in workbench is, where the 220 outlet for the kiln is located, etc.

None of that stuff is really critical, though. The important stuff is all slotted into its place in the upstairs.

Tuesday, March 13, 2012

New Black Is Arriving!

It's happening! The boxes are arriving in the mail from companies all over the country as I place sample orders to get a feel for the products, reliability, and customer service of different suppliers.

In the next few weeks, I should have enough black yarn to start warping the batch of black cloth...

...and it's about time! I received another dozen requests for black cloth this weekend.

Sunday, March 11, 2012

Project Management Schedule

This post is written in response to a request to hear more about how I manage my time.

First, let me say that I feel like I do a poor job of it. I'm always trying to improve, finding the balance between productivity, community engagement, and personal life.

I use a methodology called Getting Things Done by David Allen, often shortened to GTD. It is a pretty inexpensive book, available used in paperback for a few dollars.

The method starts with capturing everything into an Inbox, even if it's not a task, even if you have no idea where or when you'll follow up on it.

The first thing I do every morning is sit for a couple of hours in the natural daylight and wake up. The first hour or so involves listening to the birds and drinking tea. Then I fire up the iPod, catch up on blog reading, and start the productivity process for that day.

I clear my Inbox of anything that landed there the day before. I create new projects, contexts, or file things under Someday/Maybe. I review the work that is due that day and try to wrap my head around how I'll get it done. On light days I browse through contexts and see if there are any screaming for attention. "You've got a bunch of show applications due this week. Spend time in the office!" is one of the things that OmniFocus might say to me.

Next, I write a blog post or two. The one exception to my task management system is my blogging. Instead of keeping upcoming blog posts in the GTD queue, I keep them in the drafts folder of Blogger+, my chosen blogging app. Throughout the day, when a blog topic hits me, I open it up and create a blank article with a title to remind me what it will become.

Then, I respond to blog comments and write important emails. I used to leave emails in my mail program's inbox until I responded to them, but I don't do that anymore. They all get put into OmniFocus because I forgot about too many over the years. Once they scroll off the first screen, they're gone forever as far as my sieve-brain is concerned.

After this, all bets are off for how my day gets spent. If there are time-critical tasks in town that don't involve just "picking something up", I'll have to take a trip to town. And when I do, I make it count. I'll do every single task from every project, whether it's due or not. This habit means that I only go to town once or twice a month.

To decide how much time I need to spend in the studio, I have a production calendar on paper on the wall. With it, I track how many hours are spent in the studio by everyone who helps. At the end of the week I total up actual hours, carry an deficit to the next week, and track production value. There is a minimum retail value that needs to be produced every week. There are two numbers that I calculate every week to help with that - average weekly production, and catch-up production. I arrive at the average by dividing the retail value of the year's production by the number of weeks we've worked this year. If it's below our required weekly production, which it always is, I track how much we need to produce that week to catch up to our average.

All of this is just a fancy way to track for myself and communicate to others how much work there is to do so that we have inventory for our midsummer shows.

Once I've put in the production time for the day, for the week, or whatever, then I spend any remaining time on other things. There's always a ton to do: bookkeeping, Etsy store management, show research, and more.

There's one more routine GTD task that helps keep all of this stuff on track... The weekly review. Once a week I review every single project, including Someday/Maybe. I make sure that every one of them has an appropriate next action, and that every action has a context. Some weeks, I consolidate projects and restructure them to make more sense, organize contexts, etc., but this usually isn't necessary.

Saturday, March 10, 2012

Wrap-around Lighting Rig

Before traveling to a show and setting up with other vendors and show organizers watching, I like to test my rigs at home.

Here's is how it packs up. (And a record so that I remember which pipes nee to be packed for this configuration...)

When I bought the tube and joint booth parts, one of the uses that I envisioned was as a wrap-around rig for lighting that could be used to give me an overhang for the 10x10 canopy without putting strain on the canopy frame itself. For nighttime and indoor shows, this would be used to hold a lighting. For daytime outdoor shows, it could be extra shade.

Friday, March 9, 2012

Beautiful Exhibit Hall

The show this weekend is inside a massive space called the Evergreen Space Museum. Inside this room with us are dozens of incredible machines: satellites, space shuttles, rockets, and more. It could be a fun day's adventure just to come and see them.

The ceilings in here have to be 100' tall, making our craft show seem like a tiny little village scattered on the floor.

Cone Winder Clinic

One of the cone winders broke down the other day, throwing one of its chains. After a few million revolutions, things tend to go a little slack sometimes.

Thankfully, these machines are pretty easy to fix. I just pulled it apart, put the chain back where it belonged, and tightened up the rest of the mechanisms.

While I was in there, I noticed that one of the springs looked and felt a little stretched. I'll replace that soon and the machine should be good to go for another thousand cones or so.

Thursday, March 8, 2012

Homepreneurs Blog

As part of my ongoing entrepreneurial education, I follow a number of small business and finance blogs.

There's a blog called Homepreneurs, focused on ways that people can start and run businesses from their homes. Right now they are running a series of articles on home-based crafts business. If you've ever thought about doing this yourself, I'd recommend checking it out: http://homepreneurs.wordpress.com

Wednesday, March 7, 2012

Reader Question: Breaking Threads

Someone recently asked me about my tension box and why theirs might be breaking threads. Thanks for asking!

I though I'd post the answer to my main blog so everyone can read it.

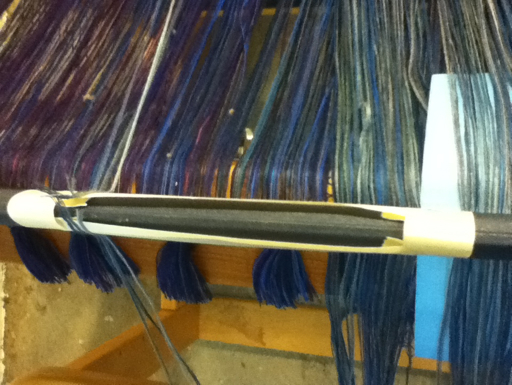
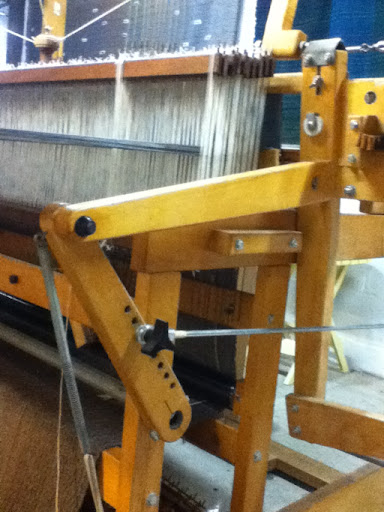
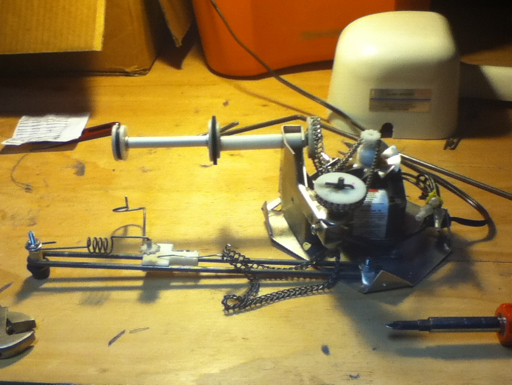
I made my own tension box and I'm surprised it has lasted so long! I expected to replace it with a "professional" one by now. Instead, I've modified this one to keep on trucking.

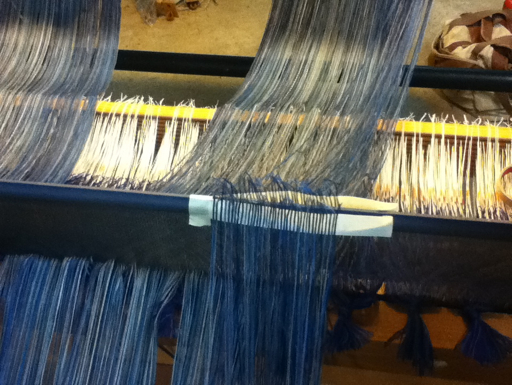
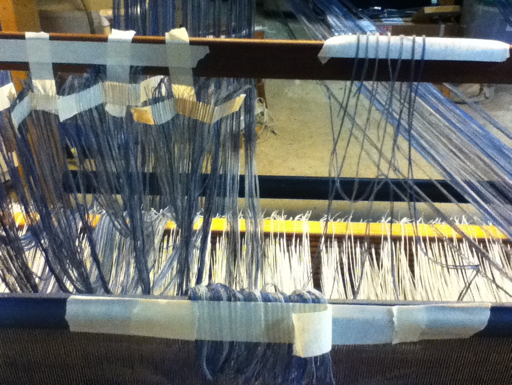
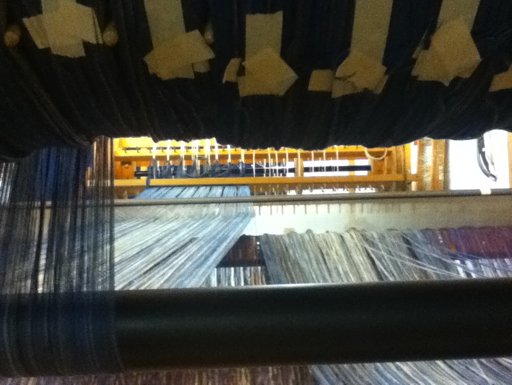
There are several features that I want out of a new box based on my way of working. First, I need both the entry and exit reeds to have an open top because I unthread and rethread the box for every section. This is one of the compromises that I make in order to ply my own warp threads to get the color gradients that I use.

I also need the box to be completely open on one side so that I can route the threads around the pegs quickly and easily.

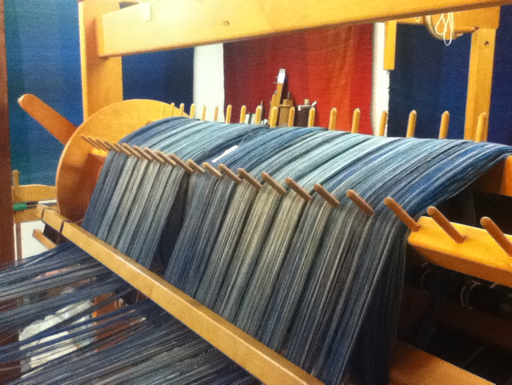
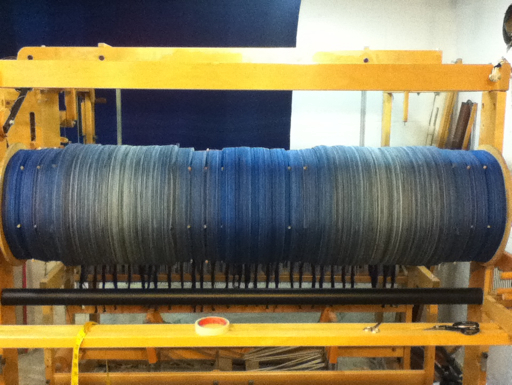
But, really, when it comes down to it, this one is not getting replaced because it works fine. I've warped over 250 sections using a variety of threads and it works great.

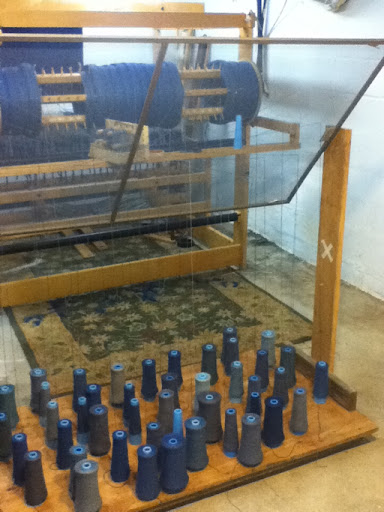
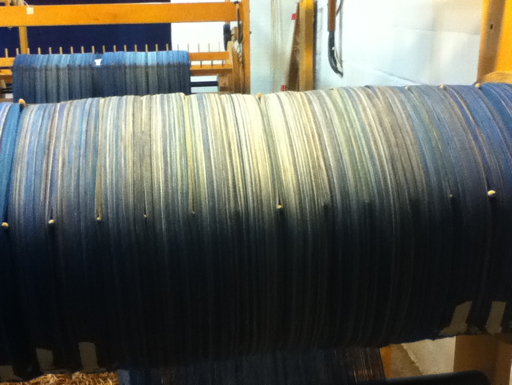
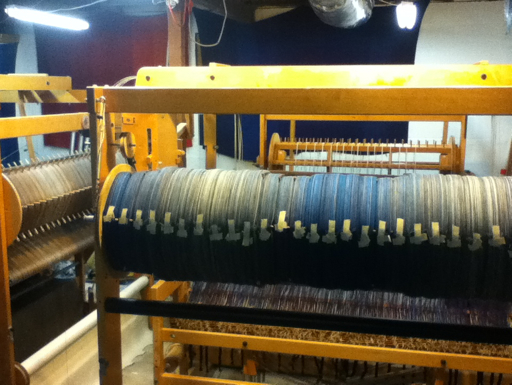
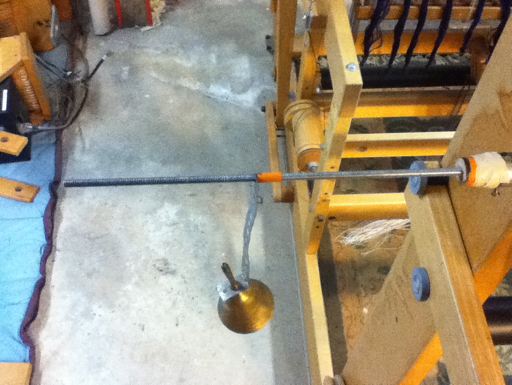
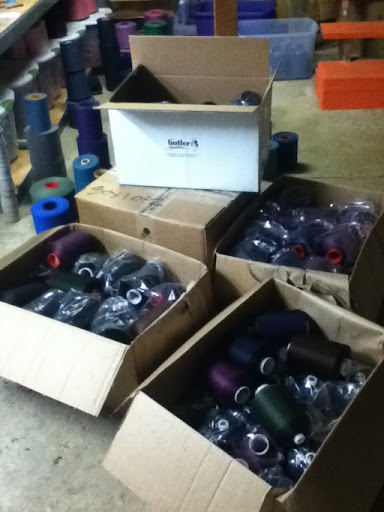
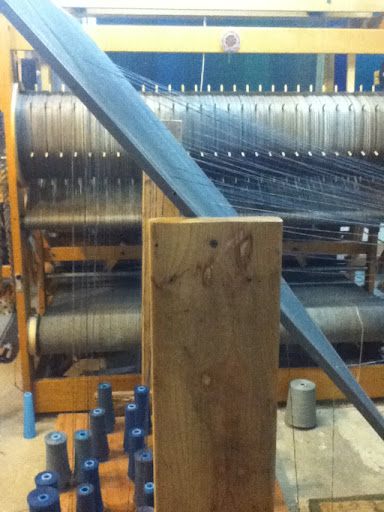
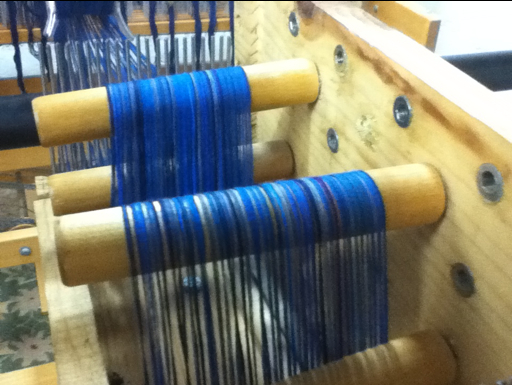
I also built my rolling cone rack. It features a tiltable screen which enables me to reverse the order of the cones in a section by simply turning the rack and flipping the screen. This is useful because I use bookmatching as a design element in my stripe patterns. Reversing the cones by hand for each section would be a lot of extra work and very prone to errors.

Breaking Threads


And now, on to the question... What causes threads to break in the tension box?

Of course, I can't tell exactly what's going on without seeing your setup, but a few possibilities come to mind:
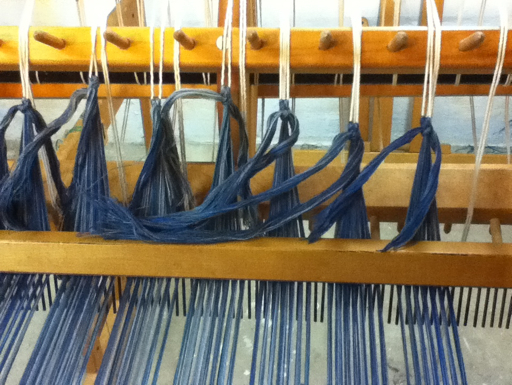
1. The pegs in the box are configured to give too much tension, causing the threads to snap. Reconfigure the pegs to give you less tension. If your box has a lot of pegs, you may need to remove some.
2. The threads are brittle. This happens often with overdyed black yarns. They're basically unusable because of their weakness. If you pull on the yarns and they fall apart easily, you'll have to get new yarn. Weak thread makes weak cloth.
3. The threads are tangling on their way into the box and snapping because they're caught in the entry reed.
4. The threads are catching or tangling somewhere else on the way to the box. This can be tricky to catch. Maybe it's the cone rack or the cones themselves. Maybe threads are sticking together somewhere. It's easier to find this stuff if someone else can turn the beam while you act like Sherlock Holmes and inspect every part of your setup.

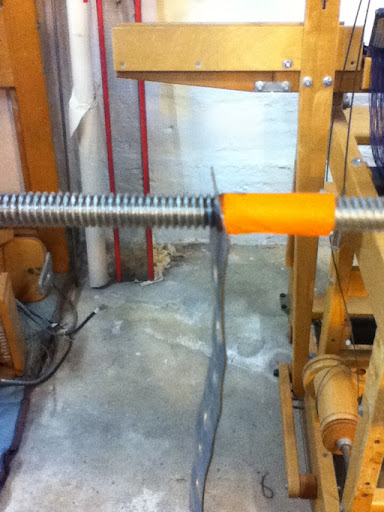
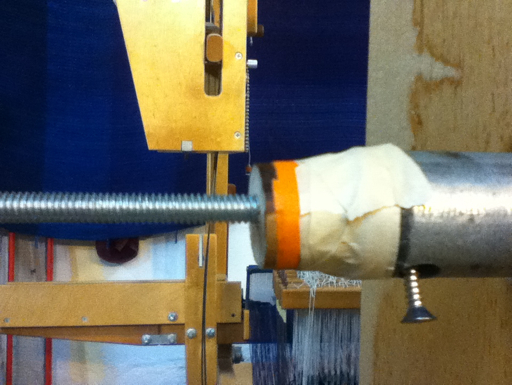
The last two are more complicated to fix. They are the reasons why I built the cone rack in the first place. The diagonal screen unspools the cones and gives them a clear path to the tension box without being able to snag on each other or anything else.

If you're using chained warp sections, consider a "warping valet" with very little weight - just enough to keep your threads from tangling on the way into the tension box. If you're winding from cones, try fixing a piece of landscape mesh, chicken wire or screen at an angle above your array of cones, ensuring that each cones unwinds straight up to prevent tangling.

I'm also happy to give more help if you can send me photos of your setup and tell me some more about the threads you're using.

An Offer


I'm putting this out there just because I've never explicitly said this before... I'm happy to help other weavers to figure out problems with their weaving.

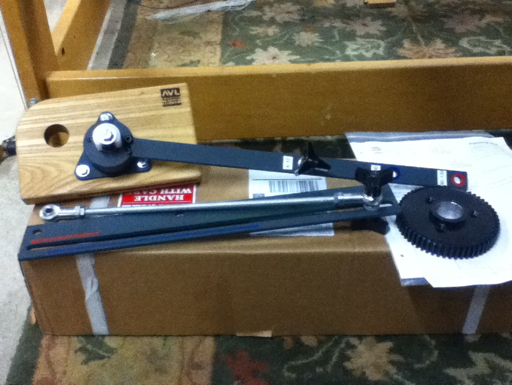
When it comes to weaving, I am very well versed in a few things, namely mechanical AVL production dobby looms and sectional warping with cotton. Anything else is hit-or-miss, but I'll let you know if I can help. I have worked on all kinds of other looms, but the lion's share of my experience is on this specific machine.

Tuesday, March 6, 2012

Blog Comment Reply Day...

Eureka! Another piece of the notebook-less lifestyle clicked into place yesterday. Let me back up a bit... My notebook is dying. It has been for a while, but now I think it's for real.

OK, so I have to plug it into a network because the WiFi doesn't work. That's not ideal, but it's workable. But now the hard drive makes a loud clicking sound. The screen doesn't get very bright, and the hard drive runs continuously, apparently swapping out memory. As a result, it can take a long time to do just about anything.

I've held off on replacing it because I can do almost everything on my iPod. Seriously. The major things that I do on the notebook are photo management and certain online stuff. There are things that don't work on a small screen or functions that the mobile apps just don't have.

One of those features is replying to blog comments. I just have not taken the time to get out my notebook and plug it into the router in our always-cold library. The end result is that I've been inadvertently ignoring blog comments.

Well, that changed yesterday when I discovered that one of my blog writing apps actually does a great job of managing and allowing engagement with blog comments. So, I went through and replied to all the neglected comments.

If you've been wondering whether I had gotten your comments, I'm sorry for the delay. Thanks for leaving comments, and I promise to be more engaged now that I can do it from the fantastic little computer that's always in my pocket.

Monday, March 5, 2012

Show Acceptance

I'm feeling very lucky right now. A while back I gambled on buying a professional photographic backdrop and spending the time shooting my own work instead of hiring a professional photographer. My logic was this: if I hired a pro, the money would be gone and I'd have one set of photos. If I bought the materials to do it myself, I'd still have them for future use.

I seem to have won the bet. My homemade photos are proving to be good enough to get my work juried into high quality shows. You can see my show schedule on my main website: HERE. Once or twice a week I receive an acceptance letter to another show, and when I do, it's added to the calendar.

At this point, I'm pretty well booked up through July. Yeah, there are other shows that I'm waiting on, and a few that I haven't applied to yet, but many of the best ones have accepted me already. Woohoo!

Sunday, March 4, 2012

Blue Has Really Begun

The blue beam is under way. Somehow it doesn't feel real while I'm plying the cones. It's when the thread starts to wind onto the beam that I have truly committed to the design.

The vision for this beam is kind of complex: early morning light reflecting from water in a foggy lagoon. This means deep blue-greens, lots of grey-blues, and some pure grey. We'll see whether I reach my goal or whether the muse steps in with a different idea...

Saturday, March 3, 2012

Loom Anniversary

This past week, an anniversary came and went. It has been three years since my trip to Chico, California to pick up my reconditioned AVL production dobby loom. She came to me with the name "Ugly Betty", which I instantly shortened to "Betty" because she is anything but ugly to me!

At the time I was concerned about making the loom pay for itself. Boy, oh, boy, has that happened! Betty has exclusively supported me for three years now, and made it possible to buy two more AVL production dobby looms.

Happy anniversary, Betty! You're as beautiful now as you were the day you arrived.

And a side note... For that trip to AVL, I had to rent a cargo van for the day. Now I own almost exactly the same van. Yay, progress!