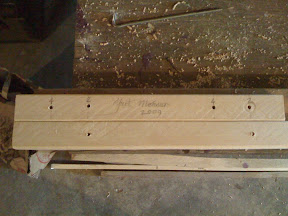
Wednesday, December 30, 2009

Yurt Workshop, Day 7


[Sea of knots]

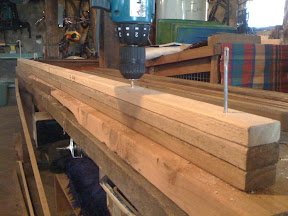
These last couple of days have involved nothing but the tying of knots. It's kind of incredible that sturdy walls can be created by thin strips of wood and hundreds of knots.

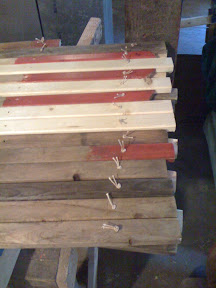
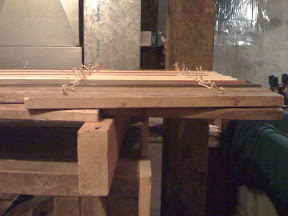
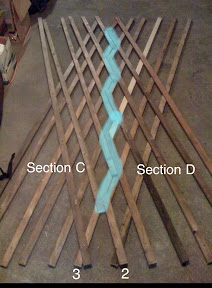
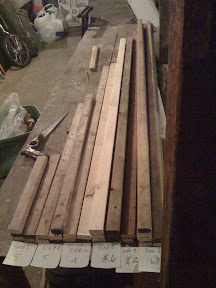
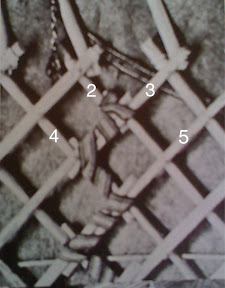
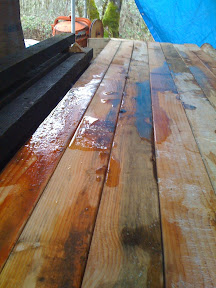
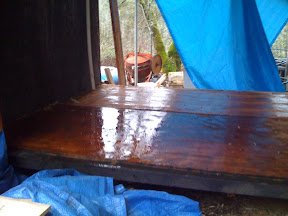
To demonstrate the lashing used to hold panels together, and to figure out how much strap is required, I stood up two sections and lashed them together. 20 feet is the answer. To make a traditional yurt of this size, I'll need to weave three 20' straps to hold the panels together.

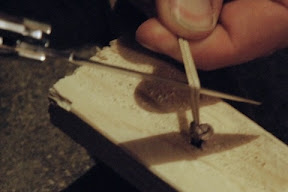
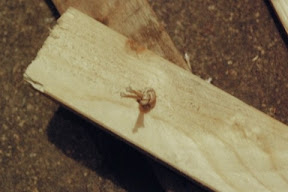
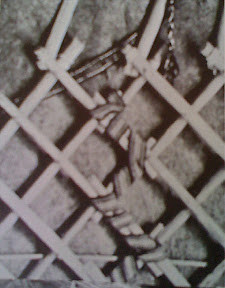
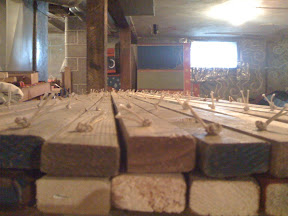
[Closeup of the lashing]

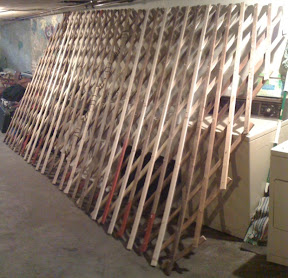
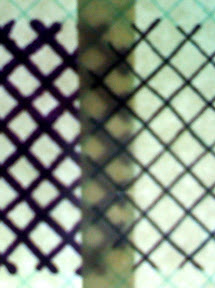
[Two panels lashed, a sight to behold]

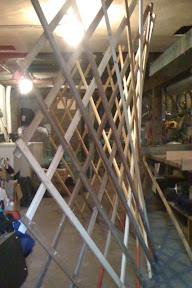
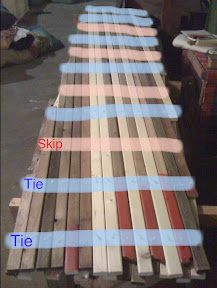
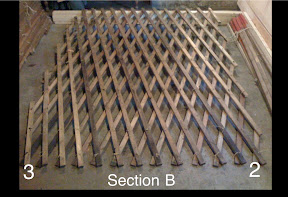
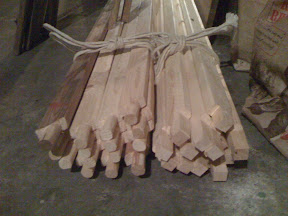
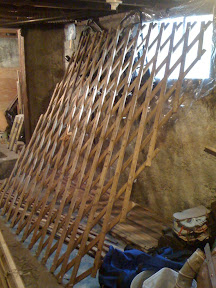
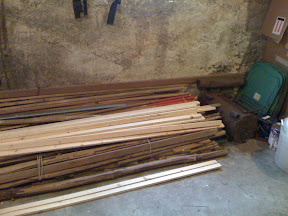
After this, my work here is done. The panels are all labelled and stacked neatly in a corner. It's hard to believe that a beautiful 450 square foot home can slide easily onto the floor of a station wagon, but that's the attraction of the yurt. Nearly anyone can build one with cheap materials and simple tools. It can be set up in a lazy afternoon, taken down in an hour, and transported in an ordinary vehicle. Now that I know how to do the hard parts, I can't wait to design and build my own.

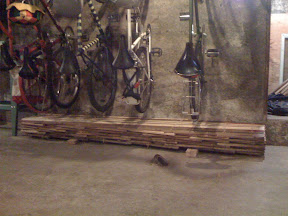
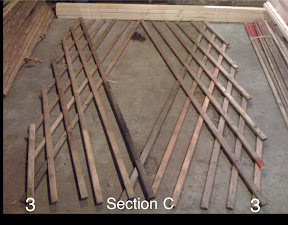
[All four panels finished and stored]

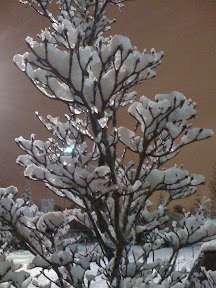
And then I emerged from the basement to find Portland covered in snow. The whole household went for a walk to the video store. Beautiful!

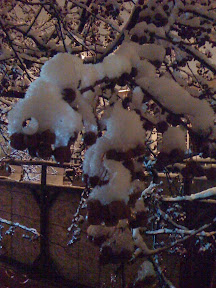
[Crab Apples in the snow]

[Snow piled high]

Tuesday, December 29, 2009

Yurt-Building Photo Essay: Drilling Jigs

When building a yurt, the lion's share of time goes toward tying knots. The next longest task is drilling over a thousand holes. It's important that it be done quickly and accurately. To that end, it pays to make a couple of jigs and learn to use them efficiently.

The master jig is short and holds three measurements: the distance from the top to the first hole, the distance between holes, and the distance from the last hole to the bottom. (I put extra holes in my jig, but don't use them.)

In designing this yurt, Cobb was very smart. He set it up to use standard lumber, 8' 1x2s. That's 96". The top hole is two inches down. The bottom hole is 4" up, leaving a little extra space to keep the bottom knots dry. That leaves 90" for 10 spaces, 9" each.

[Master jig, 2" from the top]

[Master jig, 4" from the bottom]

[Use a pin in the previous hole when drilling.]

[Use a full-length jig to drill rods 2 at a time. Notice the pin in each end.]

Yurt Workshop, Day 6

Yesterday I found another problem with the yurt panels. My measuring stick is slightly different from Cobb's and the new lumber is slightly longer. This means that the ends aren't quite perfect, being sometimes off by as much as 3/4". It's a little tough to see because there are some rods that we knew would be shorter. Those were reclaimed from broken rafters.

In the end, we stood it up to see if it was close enough. And it was! No matter how tight the knots are, there's always a little play. This is actually necessary because of the curvature that happens when the panels are bent. This structure is way more forgiving than I had understood. Cool!

[Look how uneven the ends are]

[But it stands just fine]

[Look how curved the walls are!]

Then it was time to buckle down and get lots of knots tied as fast as possible. Putting the panel up on the workbench made it easier to reach with comfort. Putting it up on blocks made it easy to reach beneath without lifting the panel every time. I got Section D finished completely and Section C halfway done. One more day and I'll have all of the wooden pieces finished.

[Up on blocks to make the knots easier to tie]

[Not every row needs to be tied]

Monday, December 28, 2009

Yurt-Building Photo Essay: Tying Knots

This little photo essay is the best way I can think of to demonstrate the fat knot used to hold together the lattice wall sections. It pays to figure out how to tie these knots tightly and quickly. There are 600 of them in the four wall panels.

My friend, Sage, took these photos for me. You can see some of his art on his website: http://sage-ink.com.

[Tie "the knot" (demonstrated below) to go on the bottom, where it's tough to reach]

[Twist an overhand knot an extra half turn to make a Figure 8 knot]

[Use the needle to tighten it snugly against the wood]

[Use pliers to tighten all knots]

[Tie an overhand knot below the figure 8 to make it even tighter. You may need two or three if it's still loose.]

[Cut it off]

[And it's done. Just 600 more and the walls will be finished.]

Yurt Workshop, Day 5

[Traditional lashing, image from Shelter, an amazing book about eco-friendly homes from around the world through the centuries]

A big part of this project's learning process involved the lashing that joins sections of the yurt walls together. In order to create a strong join that minimizes the disruption to the spacing of the crosses at the ends, the zigzag starts one joint from the top and ends one joint from the bottom. I did all the figuring on paper, and yesterday was the first time I saw it laid out in front of me. It works!

[The zigzag lashing: traditional, elegant, stable]

By the end of a lazy day yesterday, I had finished all of the complicated end sections. There are no more stray short pieces. Woohoo! Now it's just a matter of going through and tying in all of the full-length pieces to complete Section C and Section D.

[The last section ends are done]

Saturday, December 26, 2009

Yurt Workshop, Day 4

At last I'm doing the work that makes the most substantial part of the yurt: the walls. The figuring is done and it's time to tie hundreds of knots.

First, I had to repair the section that gave Cobb trouble when he built the yurt in the first place. The numbers didn't match up so the lashing of the sections was problematic. It's the trickiest section because the two edges don't match by design. The first rod has 3 holes, the last rod has 2.

After fixing that section, I went on to the most difficult part of the next section: the edges. They were all tied up just in time for people to start arriving for craft circle.


[The trickiest section to build because it's not symmetrical.]


[The hardest part to figure is the edges so I do them first.]

Lots of people came over and brought crafts: sewing, painting, beadwork, and more. We lit a fire, put an extra leaf in the table, and had a great time. This is one thing that attracts me to Portland over San Francisco: people spend lots of quality time together outside of bars and clubs.

Cobb took charge of the DJ role, entertaining us with Eritrean lyre music, a close direct descendant of the ancient Greek playing style. He's preparing to build himself a replica Greek lyre and teach a course on playing it traditionally.

I was very happy that I saved the rafter ends to carve during the circle. They slid neatly under the table and let me sit by the fire and socialize while I worked. See that weird contraption in the middle of the floor? It's the center ring that holds the yurt roof together.


[Panorama of the scene while most people were on a smoke break. Still working are Tos, Chance, and Okram.]


[Kevin and Okram crafting away]

Friday, December 25, 2009

Yurt Workshop, Day 3

[Bundles of rafters, ready for today's craft circle]

Yesterday was a big day for learning. I think I've finally wrapped my head around the geometry of the wall pieces. The lashing and arrangement of the wall pieces were tricky, but one more trick was waiting in the wings. To keep the lowest knots from getting wet if rains leaks in, every wall rod that touches the ground is 2" longer on the bottom.

This means that there are 19 different lengths, cut with little slop factor and tied in a specific arrangement. Once I realized this, I had to recalculate the requirements and recount the existing pieces.

The calculating and inventory are all done. We ran to the lumber yard for more 1x2s. The short pieces are all cut and drilled, reclaiming as much wood as possible. The rafters are all sawn and chiseled.

Today there are a bunch of people coming over for a fire and craft circle. I made sure that there was a task I could do while being sociable by the fireplace: carving rafter ends. Some of them need to be cut from square to round. Then they all need to be tapered and fit to the roof ring.

It'll be nice to see people and come out of the basement for a while.

[Piece counts, before]

[Piece counts, after. Twice as complex.]

[Stacks of reclaimed pieces on the workbench]

Thursday, December 24, 2009

Yurt Workshop, Day 2

This was a day of research and geometry. I started out believing that each wall section is identical, but my observations of the existing pieces didn't bear this out. Cobb showed me the book that was his guide: The Complete Yurt Handbook by Paul King. It showed a diagram where different sections had timbers of different lengths but didn't explain exactly why.

After a few hours of analysis and studying photographs of yurt interiors, I discovered that the sections are traditionally lashed in a specific way. The join is a clean zigzag beginning one joint down from the rafters and ending one joint above the floor. In order for this to work without unneccessary timber overlap, each section is slightly different.


[Photograph of wall sections properly lashed. Numbers count the joints per timber. Image from Shelter]

I worked out on graph paper just how the sections need to end in order to attach them with a tidy lashing that doesn't impact the rafters. With a light table to assist, I checked that my drawings were correct.


[My graph paper mockup]


[Full drawing of two sections. Notice the slight difference on the left side of panel B.]

The next step was to open up the existing sections and inventory the parts. I now know how many pieces are supposed to be in each section, and I know how many are in the surviving sections. The next step is to go over the broken wall pieces and make short timbers for missing panels from them. Then I'll know just how many timbers we'll need from the lumber yard. That will all have to happen tomorrow.


[One nearly undamaged section]

Wednesday, December 23, 2009

Yurt Workshop, Day 1

[Cobb, an urban medievalist, plays a handmade virginal]

I'm in a strange place right now with my weaving. I can't pick up my next beam until January, and my personal yarn stash isn't sufficient to weave a beam of my own. Sometimes I think my habit of planning months in advance is ridiculous, but a mistake like this tells me that it isn't.

On the other hand, I have a goal to design and build a yurt for my next home. Before I do this, though, I need some practical experience with them.

My friend, Cobb, has built a few yurts. I fell in love with the 16' yurt he was living in a few years ago. Last Winter, it was set up inside a barn during an unusually heavy snow storm. The barn roof collapsed, flattening the yurt.

Thankfully, yurts are able to go flat without being completely ruined. There are hundreds of pieces, and most of them were unharmed. The most crucial piece, the roof ring, made it through with just a few nicks.

So, for my unplanned vacation, I've come up to Portland to help Cobb repair his yurt. We're also talking a bit about how I can design and produce cloth to sell at Camlann, a medieval festival that Cobb has done for years.

The first step in the restoration is to inspect and inventory the parts that survived. Then, I'm carving new rafters before we get the lumber required for the wall sections.


[The yurt looks like a pile of lumber]

[Some wall sections are mostly broken]

[Rafter ends are carved by hand]

[Done for the day]

Tuesday, December 22, 2009

Sunday, December 20, 2009

Where Does The Time Go?

[2x4s are wet...]

[...with a solid floor so they would stay that way]

I still get caught by surprise at how long it takes to do things here on the land. A project that should take an hour takes a day. Here's today's example...

There were two sheets of 3/4" plywood stored safe and dry near my cabin when I left for San Francisco. Today I had allocated an hour to install them as a floor to distribute the weight of my loom when I put it on the loft. I don't want all that weight on just a couple of joists.

I went to retrieve them and, surprise! They weren't there. A search of the land located them, laid as the floor of an ill-conceived lumber storage platform. It had been designed and built in a way that maximized the capture of rainwater and kept the lumber wet once it had gotten that way.

Notice that I don't name the person who did this. I generally do my best to make other people look good, especially in a public forum like this. In this case I don't even know who did it and I'm not going to try to find out. It's more important to me that we solve the problem and teach new people how to make good decisions in the future.


[Two hours later, it's restacked to dry out and shed future rainwater]

After a couple hours moving all the lumber, removing the plywood, and restacking the lumber, I was ready to... bring the plywood into the house and let it dry. I'll be installing it tomorrow, my one-hour project requiring 10x the work and stretched to 24 hours. I now have plywood crowding my house on the day that guests arrive to stay with me. Thank goodness I found it today, though. It's warped, but another week soaking in water and it would have been ruined.

As I passed through the garden after stacking wood I noticed some birds eating the last rotting apples at the top of the tallest tree. Cedar Waxwings! They are beautiful with their crest, black mask and smoothly colored bodies. They look like they were painted with watercolors. Seeing them is just what I needed to cheer me up. I've never seen them here before.

[Image from the iBird Explorer app]

Saturday, December 19, 2009

New Library Is Open!

[Wolf Creek Library in the News]


[Opening Ceremony]

[Cutting the ribbon, photo by TJ]

[Local Celebrity: Wolf Creek Jim, the Cowboy Poet]

Today a few of us went into town for the grand opening of our new town library. The tiny old one was closed many years ago. The new building was finished 2 1/2 years ago, but only open 3 hours a week as a reading room. Now we have a librarian, a system for checking out books, and internet terminals for public use.

The library is a major milestone for this town, and made possible through the hard work of many volunteers and donors. It is not funded through the state or county like many others. The people of Wolf Creek have made it happen all by themselves.

The ceremony was sweet, with music, poetry and readings by local authors. I was particularly taken with Wolf Creek Jim. He's been a gold miner in these hills for many years. He recited a poem called "Bureau of Large Mistakes" criticizing the bad decisions and mismanagement of our forestry resources by the state. He signed a copy of his book for me and gave me permission to print that poem in our organization's newsletter. It's particularly appropriate because we are currently battling the BLM as they try to log a piece of land directly above the stream where we draw water.

There was a raffle of items donated by local businesses. I won a nice gift: a free year of tire service at Wolf Creek Autowerks. Perfect!